First issue: levels. You need to get the levels up into the input rather than trying to fix it later. The old saying that you can "fix it in the mix" is simply not the way to do this.
Rather than trying to turn the vocals up.... perhaps turn the other things down. You should be able to control the volume at every stage of the process in a good DAW.
My question on this is: What does the vocal track look like as a printed wave? How does it compare visually to the printed synth track? Is the vocal track full in proportion to the track area or is it a thin line and weak looking?
In the photo below, the bottom orange track is a full (percentage wise) track. If the input level isn't right , the wave can look like a very thin blob or even a straight line. You don't want that.
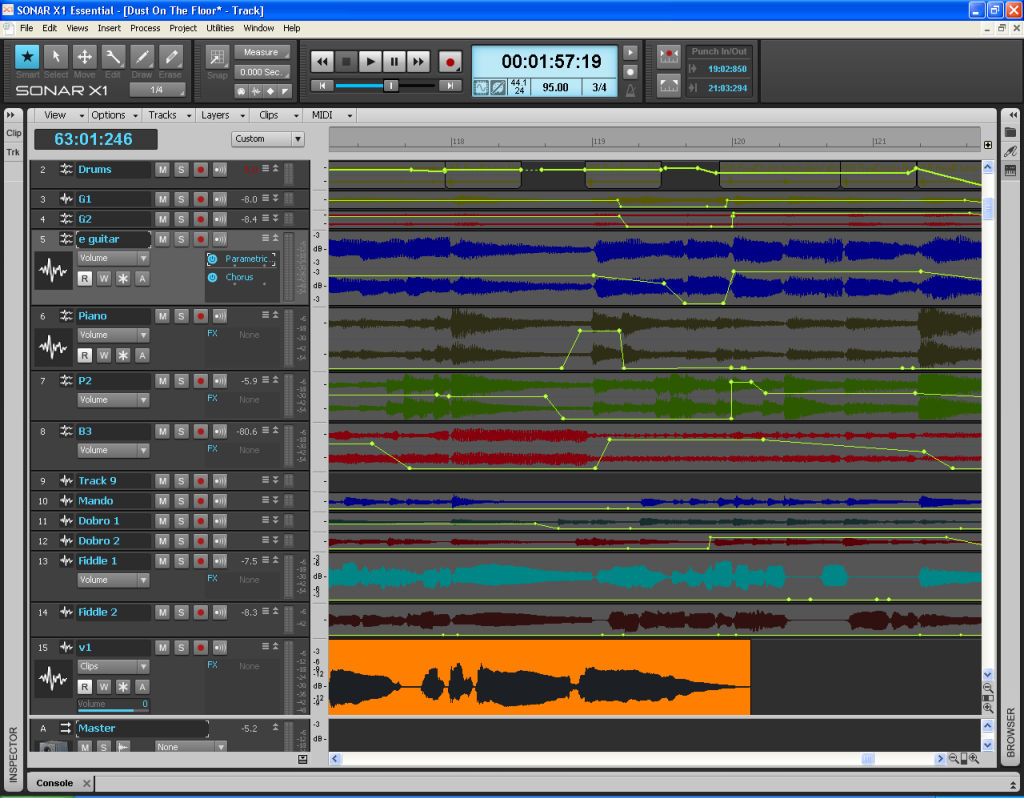
I've had skinny looking waves in the past that were anemic. It's a matter of getting the correct levels into the software. None of the waves in the photo are that way... but imagine the space taken up by the several grey tracks above the orange vocal track being just one mono track, and then just one of the skinny blue stereo channels smack dab in the center. I've seen and had waves that were that weak. Sure, you can use amplify, increase by +6dB and process that several times to get the blob up to a good size, but that's the wrong way to do it. You are essentially trying to create data that doesn't exist and that's not a good solution for a good mix in the end.
If, on the other hand, you are getting good levels and have solid looking waves that sound good when soloed, the other option is to turn down the rest of the band in the mix as opposed to trying to boost the vocals. More than one time, I have had to do that very thing. Vox sounded good, band sounded good but there was no realistic way to get the vocals up on top without going into the red, using compression and limiters to the max. So I created a new sub-buss and added all the instruments to it. That allowed me to keep the automation for the tracks in place... no adjustments needed, and I simply pull the fader on the sub-buss to the level I need for the vocals to set on top. In the end.... after I do my polishing and "mastering".... no one is able to tell how I did the mixing. The result is a good sounding mix with the vox in the right place.
Dropped midi notes: Buffers and latency settings as well as using the correct driver for the sound card and hopefully, a decent ASIO based interface. If you are experiencing dropped midi notes, it is usually one of those things, or settings not set properly.
As you run more process heavy plugs and VST's, the computer has a harder time processing the midi into audio and getting it to the speakers in real time. When it can't do that due to a lack of processing power, or being very busy, it has only a few options. It can drop some notes to keep up, or it can in some cases stop. I've had it do both on other computers.
Remember the episode of I Love Lucy where she was working the assembly line in the chocolate factory? Same thing happens in the DAW....
See what the total processor load is. Most DAW's have a processing power meter somewhere so you can see how hard the computer is working. If it's up to 60% or higher.... you might want to start using some work arounds. If the processor is running "cool" at 10% to 20%, you have settings issues. No computer DAW should be choking on midi at under 50% processor load.
First thing... try increasing the midi & audio buffers a bit. Just go a little bit at a time. Smaller buffers are best, because they make for a lean, fast machine. But reality is that sometimes you have to increase them a bit. Too little causes issues, too big causes other issues so you want to be in the middle where things are working right.
