
Downloading and installing Band-in-a-Box for Windows packages.
As of Dec 2021, an Install Manager is available, which is easier than downloading the files individually as discussed in the tutorial below. More info here.
This tutorial contains some instructions and tips for downloading Band-in-a-Box packages with a lot of RealTracks. This is especially useful for people who purchased a 'download-only' (e-delivery) version of the UltraPAK for the first time, since there are over 100 GB of files to download and install.
Even though the UltraPAK is large, downloading should be straight forward if you take a few moments beforehand to prepare and understand the process, and assuming you have a reliable broadband internet connection. If you selected the download-only option during checkout and are having trouble getting your files, you could contact us to have a physical copy shipped.
Last updated: Monday, 05 December 2022
Where to download your order
After you place your order, click on the link(s) in your order confirmation email to go directly to your Downloads page for each product. Note: for orders placed prior to March 2021 you can access the downloads on your 'My Products' page by logging onto your account at www.pgmusic.com.
For a Band-in-a-Box order, there are multiple files to download. For large packages like the UltraPAK there are a lot of files, totalling over 100 GB.
Download and install the Band-in-a-Box program
There are a couple of different options for downloading all the content installer files (detailed below), but you should know that the most important file you need to download is the first one on the list - "Band-in-a-Box and RealBand 20xx".

This file is relatively small and contains everything you need to install and run the main Band-in-a-Box program. You can start using Band-in-a-Box right away, even without having downloaded all of the additional 'RealTracks' content etc. See Running Band-in-a-Box for the first time.
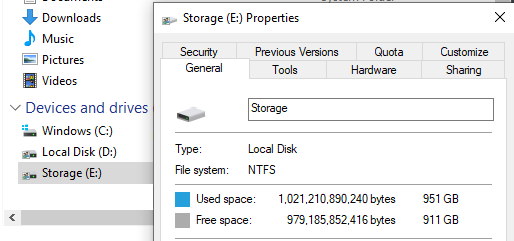
Preparing to Download the rest of the files
Prior to downloading, decide on a drive and location to store the downloaded files and make sure you have enough hard disk space there. The complete download size is listed at the top of the Size column on your download page. To keep organized, you should create a folder that's separate from your other downloads, e.g. C:\BBDownloads. Also, note that you will need an additional 1.3 times the download size for installation, which can be on the same or a different hard disk. For example, if the download was 100 GB, you'll need another 130 GB additional space for installation.
The default install location for Band-in-a-Box is C:\bb, but it can also be installed and run from an external USB hard drive. The drive that you install Band-in-a-Box on should be NTFS formatted, which is normal for modern computers (FAT32 is sometimes used for flash drives and will not work for an UltraPAK install due to inherent file limits).
Downloading the Band-in-a-Box content
You can download individual files directly from your browser window, however if you are downloading a large package (e.g. UltraPAK) this will be tedious. You can use a download manager instead... there are two options: (A) Recommended - Use a third party download manager such as "HTTP Downloader" - this is fast and reliable. (B) Alternatively, use the Band-in-a-Box Download Manager - this could be more convenient for you as long as you have activated Band-in-a-Box online, but may be slower and require some extra setup.
Using a third party download manager (HTTP Downloader) to download the files (Option A)
- Currently, "HTTP Downloader" is one of the best options. This is a small, portable download manager that is easy to use. Use the stand-alone 64-bit version (not the browser extension).
- Run HTTP Downloader. First, go to Tools - Options - Advanced to set your download directory. Also, notice that prevent system standby should be checked.
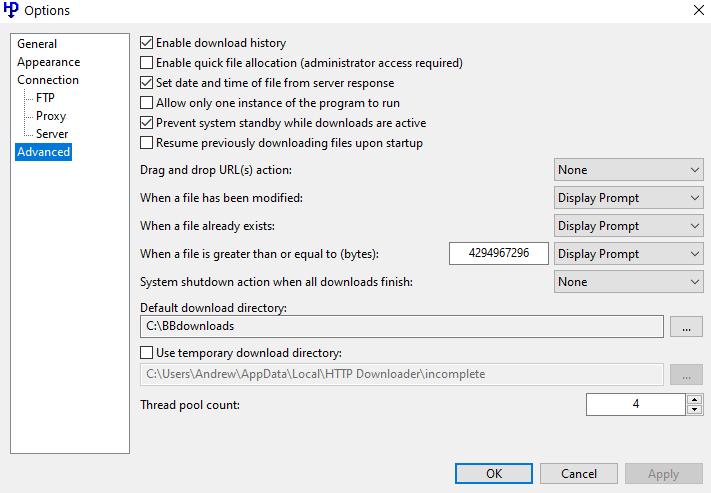 HTTP Downloader - Settings dialog
 - Click on the "Copy links to clipboard" button on your 'My Products' page.
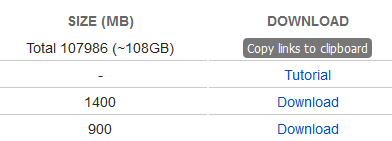 Click the Copy Links to Clipboard button
 - Click the [+] button or File | Add URLs in HTTP Downloader, and press [Download]. Note - if you've already downloaded the Band-in-a-Box program as suggested above, you don't need to download this file again so you can skip it.
The length of time the download takes depends mainly on how fast your internet connection is, so varies widely. If you are curious, there are lots of websites that will test your download speed - e.g. Google search "internet speed test". As a ballpark, 2-3 hours with a fairly fast connection (100 mbps). Remember that you can still use the Band-in-a-Box program while the content is downloading, or you can set it to download overnight.
Installing the downloaded files
When the download is complete, run the installer files. All of the files are .exe installers (e.g. realtracks346-352.exe) that are no more than about 2 GB each file. For an UltraPAK you'll notice there is a file Master RealTracks Content Installer (master_realtracks_installer_20xx.exe), that can be used to install all the RealTracks related content. It does not matter in what order you install the content.
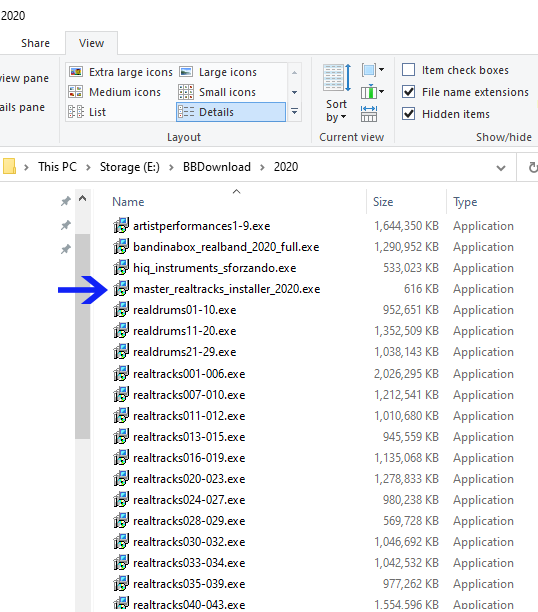
- Run the file master_realtracks_installer_20xx.exe from your download folder and it will install all of the real*.exe files. An install log saved in the same folder will keep track of which files were processed or if there were any problems. This will typically take a couple of hours for a full UltraPAK.
- Depending on your order, you most likely have a few other non-RealTracks content installers, and you should run these manually (e.g. bonus material, songs and lessons, xtra styles).
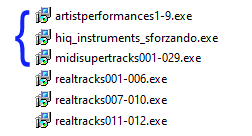 Install files other than realtracks* (e.g.)
Alternative: Using the Band-in-a-Box Download Manager (Option B)
A Download Manager is included with Band-in-a-Box (2016 and higher). This is an alternative method for downloading and installing all of the RealTracks (real*.exe) files. Before you can use the Band-in-a-Box download manager, you need to install the Band-in-a-Box program and activate it online when prompted.
- Before running the download manager, you should change your PC's power settings temporarily to make sure that computer does not go to sleep or shut down components if the download manager is operating in the background. These settings are typically found in the Windows Settings/Control Panel | System | Power Options. If you have a laptop, you should plug it into AC power.
- Run the Download Manager from the Band-in-a-Box Help menu | Utilities | Run Download Manager.
- Verify the download folder, and the Band-in-a-Box install folder, and then click the large "Download/Install Selected Files" button at the top. The download manager by default will automatically install the files when they've been downloaded.
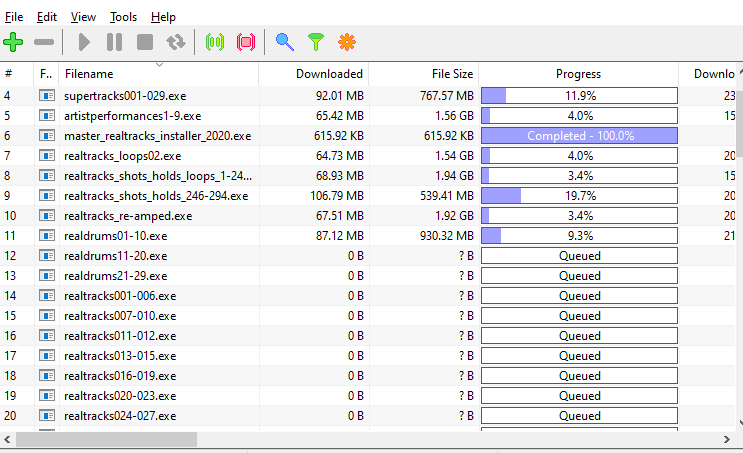
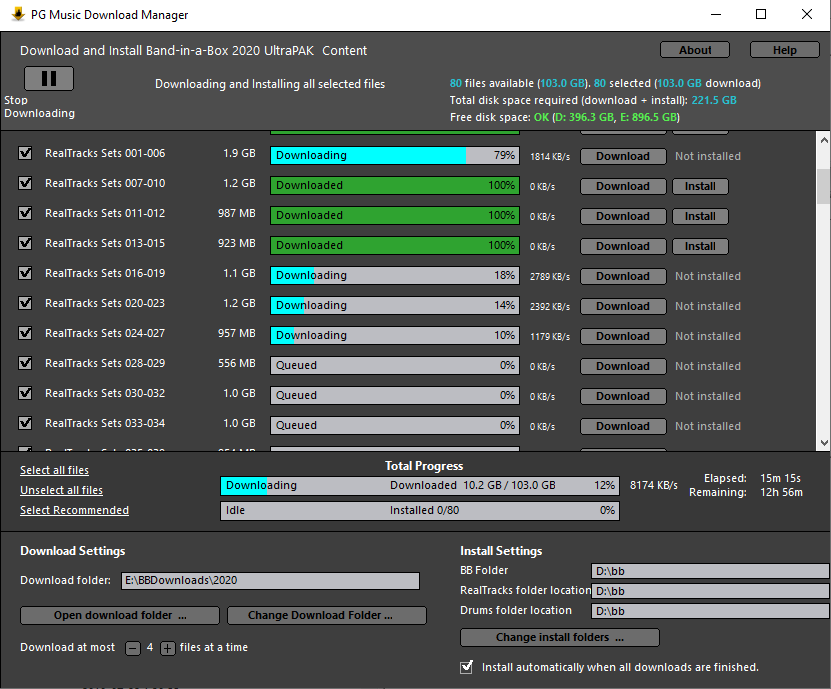 Band-in-a-Box Download Manager main screen
 - Depending on your order, you could have a few other non-RealTracks content installers, and you should run these manually (e.g. bonus material, songs and lessons, xtra styles). The download manager will not download and install these files automatically, it only downloads the realtracks*.exe and realdrums*.exe files. The other files are listed near the top of your download list on the My Products page.
We have more download manager help and troubleshooting tips.
Unconditional 30-Day Money Back Guarantee on all PG Music products purchased from PG Music Inc.
PG Music Inc.
29 Cadillac Ave Victoria BC Canada V8Z 1T3
Sales: 800-268-6272, 250-475-2874,+ 800-4746-8742*
* Outside USA & Canada where International Freephone service is available.
Access Codes
Tech Support: Live Chat, support@pgmusic.com
 Online now
Need Help?
Customer Sales & Support
|
Phones (Pacific Time) 1-800-268-6272 1-250-475-2874 |
||
| Live Chat | ||
| OPEN | Online Ordering 24/7 |
|
| OPEN | Forums, email, web support |