
Search Manual
RealBand® 2019 for Windows® User’s Guide
Chapter 4: The Main Screen
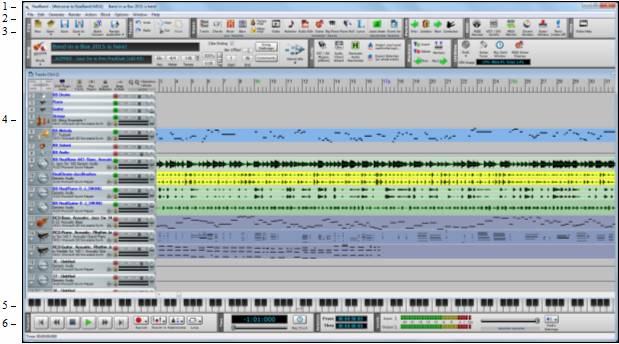
There are five parts to the RealBand main screen.
- The Status Bar shows information about the current project.
- The Menu Bar is where menus and commands are accessed.
- The Toolbars give information and access to program functions.
- The Windows area, the main workspace for all program windows (Tracks, Mixer, Chords, Notation).
- The Piano Keyboard displays, and can input, MIDI notes.
- Additional Toolbars to control playing or recording.
Status Bar
![]()
The status bar is the colored header across the top of the screen.
RealBand shows the file name for the currently loaded song in the status bar. It also shows the song title if the song has been given one, and the name of the current window, e.g., Chords, if the window is maximized. When the jukebox is playing then Juke Box mode is displayed in the status bar.
|
The buttons to minimize, maximize, and close the program appear at the right side of the status bar. |
Menu Bar
![]()
Like most Windows applications, RealBand has a pull-down menu interface. The menus list many operations that can be controlled with key strokes. These can save time and it is a good idea to memorize the ones you use regularly.
Toolbars
There are two background color and icon set for the toolbar. Go to the menu Options | Icon Set and select Classic or Modern.
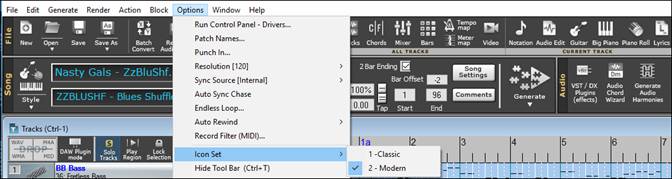
The toolbar buttons are arranged in groups according to function. You can select a background color and icon set.
![]()
![]()
![]()
![]()
![]()
![]()


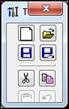
File Area
![]()
|
This will clear the current song from memory so that you can start a new song. If you have made changes to the current song, RealBand will ask you whether or not you wish to save the file before clearing the file from memory. |
|
This will open a dialog which allows you to choose a file from the disk. You can open .MGU, .SGU, .SEQ, .MID, .KAR, .WAV, .MP3, .WMA, .WMV, .CDA, or a .DP file. |
|
This will save the current song to the disk. If the song has no name (untitled), the standard Windows 'Save As' dialog will pop up , so you can choose a file name and format (e.g., .MID, .SEQ, or .DP). |
|
This is similar in function to the [Save] button except that it always displays standard Windows 'Save As' dialog. You to choose the name of the file, directory, and file type (.SEQ, Type 1. MID, Type 0 .MID, .KAR. or .DP) |
|
The Batch File Conversion feature converts a group of files in a folder over to another file type. All of the most popular audio file types are supported, as well as RealBand .SEQ files, Band-in-a-Box files, and MIDI files. |
|
This will display a menu that allows you to save tracks as a file. You can choose to save as a stereo WAV file, compressed file, WMA file, or individual file (WAV/MIDI). |
Tools Area
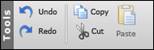
The buttons of this group control the editing features.
Views Area
The buttons in this area allow you to see various windows.

|
This opens the Tracks window. This window has 48 tracks, each of which can be designated as a MIDI track, a mono audio track, or a stereo audio track. |
|
The Chords window displays the chord symbols of a song. You’ll see the bars of the song displayed in rows. |
|
The Mixer window is a graphical mixer that lets you control the 48 tracks in RealBand. |
|
The Bars window shows the bars (or measures) of the song. Bars with MIDI data will be shaded, while bars with audio will show the audio waveform in miniature. |
|
The Tempo Map is a list of all the tempo changes that occur during the course of the song. |
|
The Meter Map is a list of all the meter changes that occur during the course of the song. |
|
This will launch the Video window, which lets you load and play a video, as well as import the audio into RealBand. |
|
The Notation window displays the notes of a MIDI track on a staff and lets you print music on your printer. |
|
The Audio Edit window shows audio data as a waveform. Select a region to edit by mouse clicking on the waveform and dragging the mouse to the right. |
|
The Guitar window displays notes played in the current track or MIDI Thru on a guitar fretboard. |
|
This will launch a resizable Big Piano window. |
|
The Piano Roll window allows editing of MIDI notes and graphic editing of controllers. |
|
The Big Lyrics window displays any existing lyrics in a track. The lyrics highlight and scroll, great for singing along. |
|
The Lead Sheet window is similar to the Notation window, except that it can display multiple staves. |
|
The Event List window is an event editor that lets you insert, delete, or change MIDI events. |
Perform Area
![]()
|
This will play the previous song in the JukeBox play list. |
|
This will let RealBand play a list of songs as a jukebox mode. In the Jukebox dialog, you can choose which songs to be played. |
|
This will play the next song in the JukeBox play list. |
|
This opens the Conductor window for live playback and looping control. |
MIDI Area
![]()
|
This will open the MIDI Driver Setup dialog which allows you to choose the MIDI input and output drivers to use with RealBand. |
|
This will open the VSTi/DXi Synth Panel together with the control panel for your VSTi/DXi synthesizer. |
|
This launches the MIDI Monitor which displays a list of MIDI events. This is useful for diagnostic purposes or education about MIDI messages. |
|
The Drum button launches the built-in 3-D animated Drum Kit plug-in. |
|
The SysEx window is a built-in system exclusive (SysEx) librarian to transmit or receive SysEx data. |
|
This attempts to shut off any hung MIDI notes by sending out an 'all note off' message to your MIDI or soft synthesizer. |
Help Area
The buttons in this area will start your internet browser and show you various support pages.
![]()
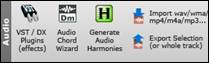
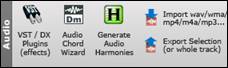
Audio Area
|
This will open the DirectX/VST window. You can apply DirectX and VST effects in real time to the audio tracks without permanently altering the actual track data. |
|
This will launch the Audio Chord Wizard. Audio Chord Wizard automatically figures out the chords from audio files (WAV/MP3/WMA/SEQ). |
|
This allows you to generate audio harmonies. |
|
You can import an audio file into the current track. If you are importing a multi-track .WAV file, you will have choice of merging to a mono or placing additional track of the .WAV file onto separate tracks. |
|
This will export the selected or the whole of the current audio track as an audio file (WAV/MP3/WMA/MP4/M4A). |
Markers Area
The buttons in this group allow you to insert or delete markers, go to the previous/next markers or open the Markers window.

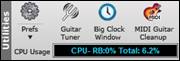
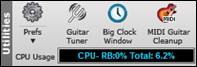
Utilities Area
|
This will open the Preferences dialog. Most program settings and options can be accessed from this dialog. |
|
This launches the Guitar Tuner, which lets you tune a guitar or other instrument plugged into the mic-in or line-in of soundcard. |
|
This opens the Big Clock window, which displays the current time location in large texts. This window has three display mode - 'Measures:Beats:Ticks,' or 'Hours:Minutes:Seconds:MS,' and 'Samples.'. |
|
This will attempt to remove the older .DG files that were named using shorter file names but are identical to the newer files with longer names. |
|
The CPU Usage Indicator shows total CPU usage and RB (RealBand) usage |
Song Panel
This area allows you to control settings such as title, style, time signature, key, and tempo, as well as generating tracks.

The title is typed in to the title window as regular text.
![]()
|
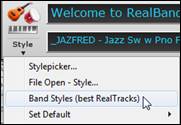
The [Style] button allows you to open a style. Clicking the lower part of the button will show you the menu that lets you open a style from the StylePicker, the Windows’ ‘Open’ dialog, or ‘Band’ styles. The menu also let you choose the default action of the upper part of the button. |
|
Selecting StylePicker from the menu opens the StylePicker window, where you can choose from any of your installed Band-in-a-Box styles. |
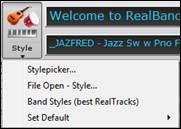
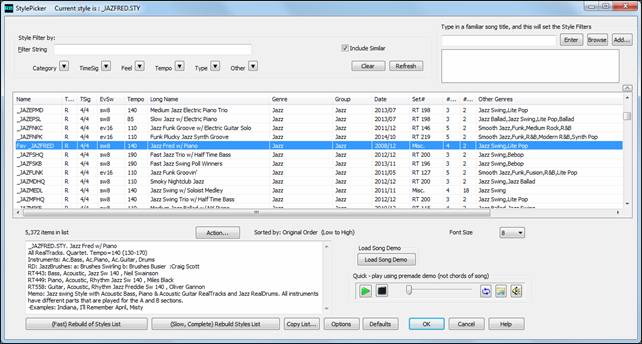
Use the filter feature to narrow your search.

|
You can audition an audio demo of a style without changing your existing arrangement, by using these control buttons. |
For example, if you see a style like _JSWINGG “Jazz Swing w/ Electric Guitar,” you can hear what it sounds like without loading in the style. This is useful because you hear an audio demo of a good example of the style in action. It is also useful because it can demo a style that you don’t have, or you can compare to make sure that yours sounds the same as it is supposed to sound.
|
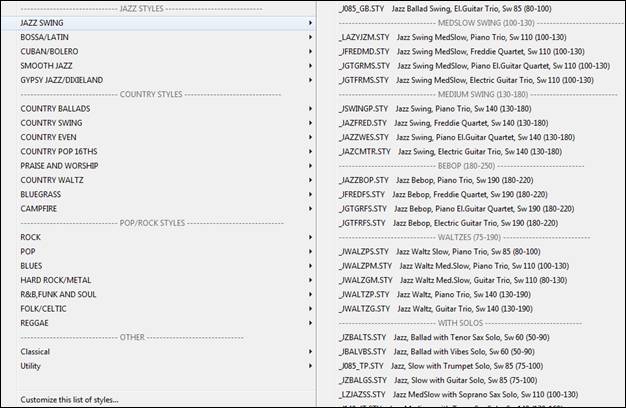
Selecting Band Style (best RealTracks) opens a list of the most commonly used styles for Jazz, Pop, and Country with several sub-genres. |
|
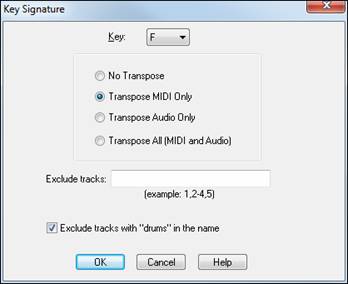
The key signature of the song is set by double clicking in those boxes to open the Key Signature dialog. |
|
This dialog has options for transposing the song’s MIDI tracks, audio tracks, or both to the new key. “No Transpose” changes the key signature for notation but does not affect the tracks. |
|
Double click the mouse in this box to open the Meter dialog. Odd time signatures such as 5/4, 7/4, 9/16, 11/4, etc. are supported. |

|
These buttons allow you to change the current tempo. |
|
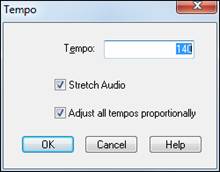
You can double click on Tempo box to open the selection dialog. |
|
The tempo can also be adjusted with these buttons. Hold down the up or down arrows to scroll the tempo up or down, or click on the arrow to increase or decrease the tempo in single increments. |
|||
|
Click on his button and type a percentage (12% - 200%) to set a relative tempo. 12% would be 1/8 of original tempo and 200% would be twice the original tempo/to se any value |
|
Tap tempos with the minus [-] and equals [=] buttons. Tapping on the minus sign four times will set the tempo just as if you had counted it in. Tapping on the equals sign four times will set the tempo at the average speed you tapped and then automatically begin song playback at that tempo. |
|
You can slow down and/or transpose any song or sequence in real time by using this button. With the high quality Elastique tempo and pitch shifting, this allows you to slow down or transpose over extreme ranges with great quality, which is a big help for learning or transcribing music, from audio or video |
||
|
These buttons set the beginning and end of the song chorus, which particularly affects how endings are played. Double click on the button to open a selection dialog. |
|
If this is enabled, 2 bar ending will be generated. |
|
This affects lead-in generation. If this is set to -2 (or any higher negative value such as -3), then the song will be generated with 2-bar lead-in. |
|
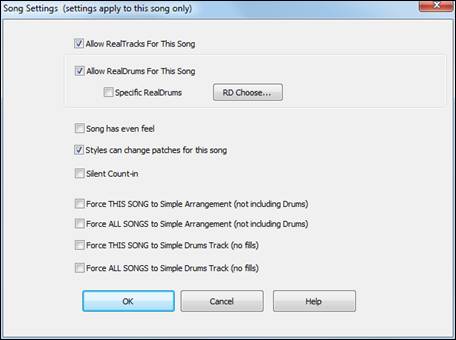
The [Song Set] button opens the Song Settings dialog with options that apply only to the current song. |
![]() This button opens the Comments Window which allows you to edit or view comments.
This button opens the Comments Window which allows you to edit or view comments.
These settings controls how the song arrangement is generated. It is possible to generate the complete song or just a selected range.
|
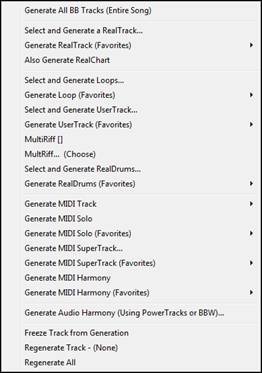
When you are ready to generate an automatic arrangement, press this button and select an option from the popup menu. |
|
Generate BB (All BB Tracks) generates new Band-in-a-Box tracks using the current style. Select and Generate RealTrack opens the RB Assign RealTracks to Tracks dialog for Real instrument selection and options for the generation of the audio RealTrack. Generate RealTrack (Favorites) opens a list of recently used Real instruments for quick selection and generation. If Also Generate RealChart is checked, a RealChart (notation) will be generated when a RealTrack is generated. Select and Generate RealDrums opens the RB RealDrums Picker for selection of a RealDrums style and options for the generation of the audio RealDrums. Generate RealDrums (Favorites) opens a list of recently used RealDrums styles for quick selection and generation. Generate MIDI Track opens a list box to select the part for a MIDI track to be generated on the current track. |
Freeze Track from Generation
You can “freeze” a track, which prevents it from being regenerated by functions like re-generate all tracks.
Regenerate Track will regenerate an existing track. If a track is a non-BB track, but it was generated individually from one of the generation options in Tracks window popup menu, or from one of the generation options on the Generate Button popup menu, then the track name will be displayed in green.
Regenerate All will regenerate all Blue and Green tracks automatically, including RealDrums.
The Piano Keyboard

The re-sizeable piano keyboard is located below the Track Window. The piano can be “played” by clicking with the mouse, either while a song is playing or when it is stopped, and clicking on a note while in Editable Notation mode enters that note in the selected track at the current time location.
There is a 1-peg hot key in the Notation window to move current time forward or backward by 1 peg (normally a 16th note). Alt+left arrow moves the current time backward by 1 peg. Alt+right arrow moves it forward by 1 peg. This makes it easier if you are using the on-screen piano for entering notes into the Notation window.
The on-screen piano also responds to mouse clicks if the current track is an audio track. This is useful if you want to hear a note played as a reference without having to change the current track to a MIDI track.
![]()
![]() The Piano Settings are found under the Piano tab in the Preferences.
The Piano Settings are found under the Piano tab in the Preferences.
They include settings for the display mode and the size of the keyboard.
|
When the display mode is set to “Current Track,” the piano will display notes as they are being played from the current track. If the display mode is set to “All notes except for drum channel” the piano will display notes that are played from all the tracks except for notes that are on the drum channel. When the “Big Sizeable Piano” setting is enabled, RealBand will show a bigger piano. For the Big Sizeable Piano, there is also a setting that gives you a choice of Show Track Number (drawn as a tiny number within the notes), Show MIDI Channel, or Show No Text. |
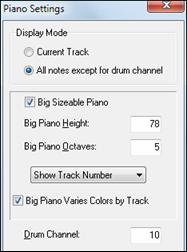
If “Big Piano Varies Colors By Track” is enabled, then the colors of the notes drawn on the big piano will vary depending on the track number. For tracks 1 through 10, RealBand uses 10 different colors, then repeats these colors for higher track numbers.
![]()
These settings are automatically saved to RBW.INI and RB.CFG so that they will remain in effect the next time you use RealBand.
Transport Area
This area allows you to control playback or recording.
![]()
|
This sets the current location to the start of the song. |
|
This rewinds the song. |
|
This stop playback or recording. |
|
This plays the current song. |
|
This fast forwards the song. |
|
This sets the current location to the end of the song. |
|
This lets you record from the current location on the current track. Clicking the arrow button will display a menu with options to Record (from the current location), Record From Start, Record Audio, and Step-Record MIDI. |
|
This will display a menu with options to enable/disable punch-in record and open Punch-in Record dialog. When the punch-in is enabled, recording will take place in the region and overwrite any existing data. |
|
This will display a menu with options to enable/disable metronome during Recording and/or Playback and open Metronome Settings dialog. |
|
This will display a menu with options to enable/disable endless loop and open the Loop Settings dialog which allows you to set the loop range. When loop is enabled, the button will be highlighted. |
Time and Selection areas

![]() The song location slider moves directly to a new place in the song.
The song location slider moves directly to a new place in the song.
![]() This is the current location in MIDI format - bars:beats:ticks.
This is the current location in MIDI format - bars:beats:ticks.
|
The “From” and “Thru” values indicate the range of bars currently selected for editing operations. You can double click in these fields to type in new locations. |
When From: and Thru: are set to the same value RealBand always generates a complete song. If they are set to different values RealBand will generate that specific range.
Levels Area
This area allows you to control volume.
![]()
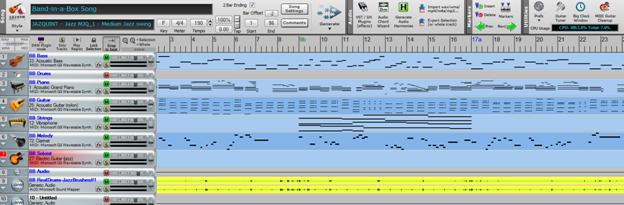
Windows
Most of the main screen is used for the windows workspace. There are many window views to choose from and you can open as many as you wish to. The Tracks window is the default view.
Tracks Window
The Tracks window shows the track names, track type (MIDI or audio), instrument settings, and an overview section showing either MIDI or audio data. This window is described in full detail in the MIDI Features chapter.
The Track Number field shows the track number.
|
If the track is the current track it will be highlighted in red. |
|
When multiple tracks are selected, the track numbers will be highlighted in yellow for tracks other than the current track. If the track is not selected it will be gray. |
Click on the track number field to make a track the current track.
If you click on the track number field while holding the Shift key, this will select a range of tracks from the current track through the number you clicked on. For example, if track 1 is the current track, and you hold the shift key and then click on the number field for Track 4, this will make tracks 1 through 4 selected. Track 1 will still be the current track and tracks 2, 3, and 4 will be highlighted in yellow. You can select/deselect individual tracks by clicking on a track’s number field while holding down the Ctrl key.
The Track Name field shows the track’s name. You can edit a track name by right-clicking on the track name field, or by double-clicking on it. After you’re done editing, then press Enter.
![]()
![]() The Mute button lets you mute or unmute a track.
The Mute button lets you mute or unmute a track.
|
The Disclosure Triangle will reveal more information about a track by making the track row height taller. If a track is a MIDI track, you’ll see Vel (velocity offset), Rvb (reverb), Mod (modulation), Loop, Key (key transpose), Cho (chorus), and Exp (expression) settings. |
|
You can make changes to these settings by clicking on the edit fields with the left mouse button, and then moving the mouse up or down while holding the mouse button down. |
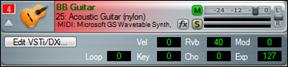
The [Edit DXi] button launches the DirectX Window dialog and will display the settings panel for either the Default DXi Synth (16th DXi synth slot which is MIDI port 32) or the current DXi port number if the track is set to a valid DXi port (17-32). Any track’s MIDI Output Portcan be set to send to one of the 16 available DXi synth ports or to any other available MIDI port.
|
The Volume and Pan sliders let you adjust a track’s volume and pan settings without having to go into the Mixer window. Below the Volume slider you’ll see two VU level meters. These give you a general idea of a track’s level during playback. |
Drag and Drop Editing
RealBand supports drag-and-drop editing in the Tracks and Audio Edit windows.
In the Tracks window you can easily move tracks up or down in relation to each other by drag ‘n’ drop using the mouse, e.g., drag track 1 below track 2 to change the order of the tracks.
You can move a highlighted region by holding down the Ctrl key with the left mouse button pressed, and drag the region to a new location in the song.
After releasing the mouse button, you have four options:
1. Move to new location and overwrite
2. Move to new location and merge
3. Copy to new location and overwrite
4. Copy to new location and merge.
Drag/Drop MIDI or Audio Files Into The Tracks Window
You can drag a file, such as a .WAV file, from a folder directly onto the Tracks window. The file will be placed on the track you dropped it on, at the location onto which you dropped the file. The types of files that are supported are the audio files supported by RealBand, such as .MP3, .WAV, and WMV.
In addition to audio files, .MID files can be dropped onto the tracks window too. If the file is a multi-track .MID it will be imported onto free tracks beyond the highest occupied track.
If you hold the Ctrl key when dropping the file, then the file will be inserted at the time location, and any existing data moved beyond the end of the file that is being inserted, rather than overwriting any existing data.
Track Overview Display
Automatic track color for Tracks Window
- The track colors show different shades for odd/even track number, making the tracks stand out.
- The track color for RealDrums is yellow.
- The colors for user-generated MIDI/RealTracks/RealDrums tracks have slightly different shades.
- The track color is red during actual recording.
- The track colors for Loops and UserTracks used to be the same but now Loops track is purple and UserTracks track is pink.
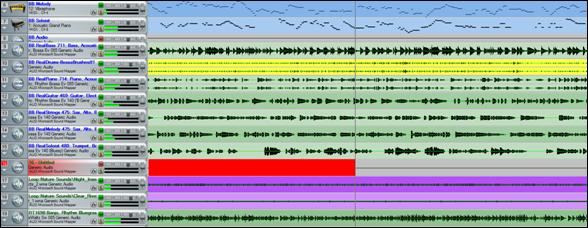
To the right of the track info panels, you’ll see the overview display.
![]()
This lets you view MIDI or audio data, and select sections for editing. You can select a region of the song during playback.
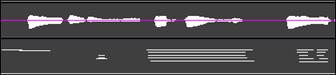
You can click and drag to highlight a section of the song for editing.
◄ Left and right ►cursor arrow keys will move the current time forward or backward by 1 beat.
![]() ►
► ![]()
If the Alt key is held when left-mouse clicking on the overview section of the Tracks window the time will be changed without affecting the currently highlighted region. This lets you quickly adjust the current time without having to worry about accidentally changing the highlighted region.
![]()
![]() Click on [Play Regionected Area] to hear the highlighted section being edited.
Click on [Play Regionected Area] to hear the highlighted section being edited.
![]() The [-] and [+] buttons let you zoom in or zoom out the overview section.
The [-] and [+] buttons let you zoom in or zoom out the overview section.
![]() The [Snap to beat] button causes the time indicator to snap to the nearest beat when changing the time location or when highlighting a region for editing.
The [Snap to beat] button causes the time indicator to snap to the nearest beat when changing the time location or when highlighting a region for editing.
Ctrl+Space Bar command will loop the highlighted region of a song (or whole song if nothing is currently highlighted).
Big Clock Window
|
This is accessible from an icon on the toolbar (same section of the toolbar that has the Tracks, Bars, Chords buttons, etc.). |
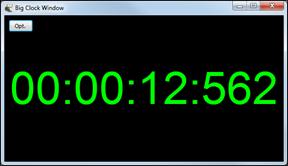
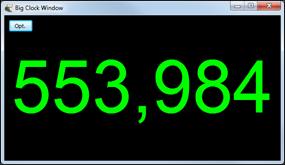
This window displays the current time location in a large text. It will show Measures:Beats:Ticks, or Hours:Minutes:Seconds:Hundredths, or Samples. Clicking on the window will toggle the display mode.
Measures:Beats:Ticks
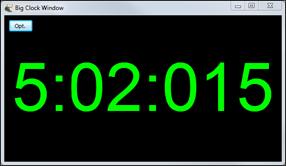
Hours:Minutes:Seconds:Hundredths
Samples
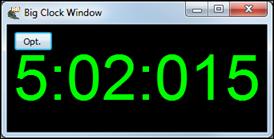
If you resize the window, then the size of the font will adjust to the new window size.
Other Program Windows
These program windows can be launched by selection in the Window menu or by clicking on their buttons in the Views Toolbar.

The Classic Tracks View is available in the Window menu or with the keystrokes Ctrl+9.

|
The menu command Window | Show Tools Panel gives quick access to the basic File menu and Edit menu commands. |
The Icon Row
![]()
There is a row of icons at the bottom of the main screen window. They give quick access to the most commonly used windows, and when you minimize any window it appears in the icon row, which makes it easy to restore when you want to work in that window again. Double click on the icon or use the standard Windows buttons to open a window from the icon row.
Unconditional 30-Day Money Back Guarantee on all PG Music products purchased from PG Music Inc.
PG Music Inc.
29 Cadillac Ave Victoria BC Canada V8Z 1T3
Sales: 800-268-6272, 250-475-2874,+ 800-4746-8742*
* Outside USA & Canada where International Freephone service is available.
Access Codes
Tech Support: Live Chat, support@pgmusic.com
 Online now
Need Help?
Customer Sales & Support
|
Phones (Pacific Time) 1-800-268-6272 1-250-475-2874 |
||
| Live Chat | ||
| OPEN | Online Ordering 24/7 |
|
| OPEN | Forums, email, web support |